
How to Install Different Types of Shower Rod
One of the basic parts of a bathroom is the shower curtain rod. Before installing it, you need to settle on which type is best for your circumstance, and afterward find a way to install it appropriately. Let’s check out the ways of installing different types of shower rod below:
Types of Shower Rod
The 3 types of shower rod you have to consider are Fixed, Tension, and Custom made.
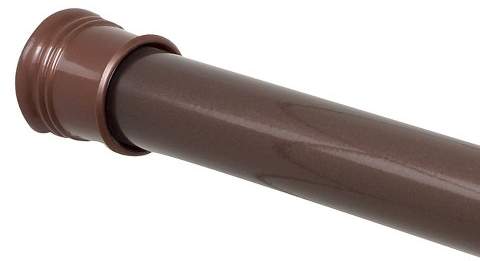
Fixed

Most of the conventional shower curtain rods are fixed. They arrive in a variety of styles and structures, and are moderately simple to install it. They can be curved or straight and they mount onto the wall utilizing equipment, making them an increasingly secure choice.
Tension
These are perfect for those that need a handy solution or are leasing, as there isn't any equipment required since pressure rods are wedged set up between two walls. While they're a simple answer for a curtain-less shower. They aren't verified and can drop strange if pulled on. Tension shower rods can likewise harm drywall if they're wedged too firmly with no stud support. To keep away from this present, it's ideal to find the studs to help prop the rod.
Custom

These are may be shaped square, rectangular, oval, or D-type rods that are appended to the roof and encompass the tub space or join to the walls for corner showers.
Shower Curtain Rod Installation

According to the types, installation process is differing. For the most part for this venture, you'll need the accompanying:
- Measuring tape
- Pencil
- Stud discoverer
- Shower curtain and rings
- Strain rod or fixed rod and equipment
- Drill & bits
- Drywall stays
- Screwdriver
- Tension Rod Installation
Stage 1
First measure the space between two dry walls using measuring tapes. Now, purchase a tension rod that is a few inches longer than the real length of your measurement.
Stage 2
Begin by opening or broadening the rod by turning every one of the finishes the other way. Do this until the pressure rod is 1-2 inches longer than the separation between the two walls and put in a safe spot.
Stage 3
To gauge the tallness, clean up curtain and hold it against one of the walls over the cover of the tub. Modify the tallness of the curtain until it’s sew is sitting 6 creeps beneath the edge of the tub. Utilize your pencil to stamp the tallness of the curtain on the wall. Measure the stature of the pencil imprint and copy it on the contrary side of the shower.
Stage 4
Slip the shower curtain rings onto the rod before putting it on that.
Stage 5
Wedge the pressure rod into spot, trying to hold one end over the blemish on one side of the shower while compacting the rod onto the other imprint on the contrary side. When the rod is set up, alter it as needs be.
Fixed Shower Rod Installation

Stage 1
Imprint the area for your best shower curtain rod for tile on either side of the shower walls.
Stage 2
Utilizing a stud discoverer, gradually slide it over your stamped territories to check whether there are studs behind the drywall. The gadget should blare or illuminate to show the nearness of a stud behind each imprint. If no stud is available, you'll need to include support, so pre-drill openings for some drywall grapples before hanging the rod. If you're working with a tiled wall, make sure that you pre-drill gaps and supplement wall stay also.
Stage 3
Screw your drywall stays into the pre-penetrated openings and after that protected the mounting equipment with screws into the wall grapples.
Stage 4
Slide your shower curtain rings onto the curtain rod before you install your rod.
Stage 5
Mount the shower rod into the rod openings and hang your curtain.
Presently you're one bit nearer to your fantasy bathroom.
Read Some Relevent Blog: